 |
 |
|
|
Foam Jet II built with no Balsa Wood |
Foam Jet II Glider in Flight |
The design of the Foam Jet II came together from a couple of ideas; first I had purchased a couple of small ARF foam gliders at my local hobby shop. The second idea came about by building the FPG-9 gliders (Foam Plate Glider 9 inches). I thought maybe the inexpensive foam material could be used to build a plane that was more attractive than the FPG-9. Another thought was to go about the design using a more scientific approach than my usual methods, I read about the Design Process on the Internet and thought I could use this as a basis for my approach.
Be sure to watch my YouTube video, “Fun with Foam Gliders” to learn more about the design of the Foam Jet II.
 |
 |
|
|
Foam Jet II Flies well with Air Hogs radio control system. |
Not pretty but it flies well |
I installed a radio control system in a Foam Jet II that appears to be the radio used in the Aero Ace Jet plane. Just guessing at balance I cut a slot for the receiver in the cardboard area, I think it could be moved back to just past the cardboard in the foam only area. With the proper balance the plane flies very well.
 |
 |
|
|
It is possible to build entire plane with low-temp glue gun. |
Foam container large enough to build wing half. |
* I built one Foam Jet II entirely using a low-temp hot glue gun. Be careful to just get enough glue on the joints and not make a mess of it. Total weight was a little heavier than using craft glue but the plane flew fine.
* Save those foam “to go” containers and you might find some that have flat surfaces large enough to cut an entire wing half from without splicing. The picture above shows a spliced wing on top of a container that was large enough.
Prototypes
With a couple of ideas in my head, I thought first I would build a couple of prototype models out a material I was more familiar with, balsa wood. I used two different thicknesses of balsa for the surfaces so I could compare weights and determine if the thinner balsa would be strong enough. Weighing the balsa models would give me an idea what weight I needed to approach when building from foam.
On the second test flight of the plane with 1/32” balsa surfaces, one wing half broke loose from the plane on launch, it would appear the 1/32’ balsa is not rigid enough on the wing. After repairing, I doubled the front edge of the wing covering about 2/3 the total area with another layer of 1/32” balsa. This appears to be strong enough for catapult launches and the plane is still lighter than the 1/16” balsa plane.
 |
 |
|
|
Balsa Prototype With 1/32″ Surfaces that Did Not Hold Up |
Foam Jet I |
With the experience of the broken balsa wing, I knew that strength might be a problem with the foam wing, especially because it had to be spliced together. My first solution was to cover both sides with tissue, I used glue stick for the adhesive. This worked for several launches but then I noticed one wing panel fold upward on launch, there was a compression crack on the surface of one wing panel. My fix consisted of more transparent tape on both the top and bottom of the wing.
Download Plan in PDF Format:
 Click to Download Plans
 |
 |
|
|
9″ Foam Plates Used for Most of the Construction |
Foam Meat Tray |
At the same time I decided it was time to refine the design of the plane and try some new ideas. First I thought if I were to bend an airfoil into the wing, this would make it stiffer and also produce a better glide. I also thought I would try to make the whole plane lighter by cutting down on material, the wing would use only tape for additional strength. To start with I did not have enough tape on the wing and it buckled again near the center of one wing half. I then used transparent tape around across the wing chord all the way passed the second splice both top and bottom, this appears to be strong enough.
 |
 |
|
|
Craft glue does not attack the foam. |
Clear Tape used to strengthen the wing. |
The new plane is a low wing configuration, so you do not have to cut a slot in the fuselage and try to slip the wing through it. Also, I moved the stabilizer to the top so no slot is needed for that. Another change was to use a single layer of the milk carton cardboard in the nose instead of the double layers I had used on the first glider.
Construction
Start with the foam plate material first, I cut the curved part of the plate out first so I have a flat piece of foam to work with. It might be good to sketch around the plate where the curve starts so you no where to cut to get the most material possible from the plate, to make some of the parts you need every bit of material. The first plane took six plates with some material left for parts for another plane.
 |
 |
 |
 |
|
|
Cut out the imprint in the foam, that section is not used. |
Close fit to cut some of the parts in the flat area of the foam. |
Next, parts can be drawn on the foam. With an extra copy of the plans, you may cut paper templates from the plans or you could just draw the pieces on the foam by measuring off the plans. A good scissors will cut the foam plate material easily or it could be cut with a knife or razor blade.
* Remember there needs to be two sets of foam plate material parts for the fuselage also.
Next, layout the pieces from the meat tray material, trying to avoid the imprint areas in the foam. Cut out two cardboard pieces for the nose from milk carton material. If you do not want to see the outside of the milk carton material, you need to make a left and a right side part. Glue the meat tray material pieces together. Glue foam plate material to the foam meat tray foam. Glue milk carton cardboard to core. Glue the vertical fin to the stabilizer, so the glue can start to setup.
The foam can be sanded with a fine grade of sandpaper if you are careful.
 |
 |
|
|
All foam parts with splices glued together. |
Trim the leading edge sections so the leading edge is straight. |
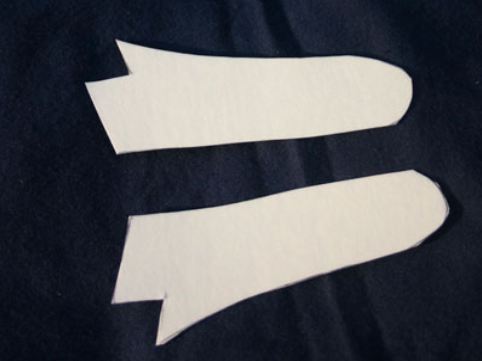
Wing
Make sure the wing sections fit together, if so glue the wing sections together for each wing half. When the glue is dry, trim across the leading edge so that it is straight. Gently bend the airfoil shape on bottom of the wing using a straight edge at the location indicated on the plans. With the airfoil bends done, trial fit the wing sections together, total dihedral should be 3″ or 1 1/2″ for each wing half. I used a sanding block across the center edge with the wing half held up 1 1/2″ to get the proper joint. When you are satisfied with the fit, tape across the chord of the wing in the center. Turn the wing over, block the wing in the center, and run a bead of glue in the crack between the wing halves.
When the joint is solid, tape up the wing. I used tape around the leading and trailing edges, also in the center of the wing at the location of the center of gravity running the entire length of the wing. Then I used tape across the chord of the wing in the center on both sides out to just past the first wing section in the center. The tape is essential, without it the wing will bend on launch.
I glued the completed wing to the fuselage using low-temperature hot glue which worked well.
 |
 |
|
|
Carefully bend wing half to create airfoil |
With the wing halves fitted in the center inverted, tape the halves together in the center and put glue in the joint. |
 |
 |
|
|
Tape folds over leading and trailing edge and goes through the center of the wing. |
Before gluing the wing to the fuselage, tape the center area across the chord both top and bottom. |
Fuselage
With the meat trays I have used, the fuselage could be made from two sections of foam. The splice for the foam tray material and the foam plate material need to be at different locations for strength. The part of the tray material in the hook area in frontof the wing could be cutoff or tapered to a point. Make sure to put scratches in all glued surfaces.
 |
 |
|
|
Foam Meat Tray Core Spliced |
View from the Top |
 |
 |
|
| Cut out a right and a left side of the milk carton cardboard so it appears crème color on both side of the fuselage. | Cut foam away under cardboard so bottom of catapult hook area can be glued together. |
 |
 |
|
| Put scratches in all surface area to be glued to help with adhesion. |
Scratches on the sides of the foam to be glued helps also. |
 |
 |
|
|
Before using scratches in the foam, glue joint came apart. |
Rear end of stab can be bent small amounts for trim. |
Launching and Trim
Office rubber bands will work for catapult launching if you do not have access to Tan rubber used for rubber powered model airplanes. The stick was from a 3/16″ dowel that was left over from building a kite.
 |
 |
|
|
Office Store Rubber Bands Can be Used but Tan Rubber Will Work Better |
A dowel and a loop of rubber to make the catapult |
Trim adjustments have to be very small on a glider that goes so fast right after launch. You can put small bends into the trailing edge of the wing or the rear of the stab. My glider has been trimmed to turn slightly to the left, I bank it to the right on launch. The glider turns gradually to the right on the way up and then turns to the left gradually on the way down, just before the glider was ready to stall. Launch at no more than 45 degree angle, otherwise it will either loop or come straight down after it reaches the top of the launch.
 |
 |
|
| Launch glider banked at an angle, trim to turn opposite direction. | Launching the glider too straight up can result in dive straight into the ground. |
Very nice detailed instructions on build. I will use this as a writing skills class assignment. Students can write about trial and error of project.
That would be great, I did use a lot of trial and error to get to the final version. The performance appears to be just right for schoolyard flying.
Bill Kuhl